How I created an AI with RAIN{Indie} and Unity3D
By Ellery Prisk | 05 July 2013
Click here for the follow up post about creating custom actions. Earlier this year, I was introduced to Unity through a group project at university. In that project, my group needed some cool AI behaviour. We tried to code it ourselves, but Rain offered much more than we could hack together. I was tasked with implementing Rain and, as a beginner, I found it a bit difficult. So I thought it would be interesting to take other beginners through the process. Here’s how I created an AI and did pathfinding with RAIN{indie}.
Introducing RAIN{indie}
Rain{indie} is a free and powerful AI tool for Unity3D. Rain provides plenty of features, such as behaviour trees and waypoint collections, that make it easy to get some dynamic behaviour in your games. This tutorial shows the use of the behaviour tree and navgrid. The goal of this tutorial is to get the cylinder to navigate to the sphere, avoiding the wall where necessary.
Setup
First we will install Rain, then we will set up a simple scene.
Add Rain{indie} to a project

- Download Rain http://rivaltheory.com/downloadindie/
- To add Rain to a new project, from the Unity menu bar, select: Assets -> Import Package -> Custom Package -> find Rain file -> select all and Import
- If the Rain option doesn’t show, select any of the options from the menu bar, that should force the Rain option to appear.
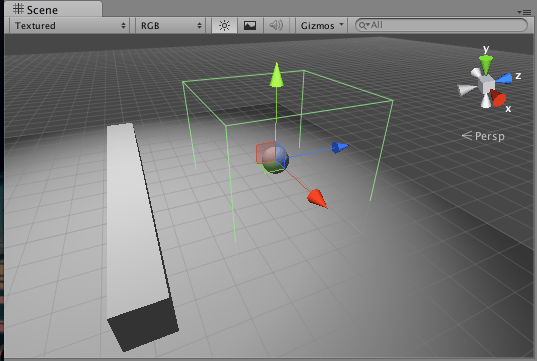
Creating a Simple Scene
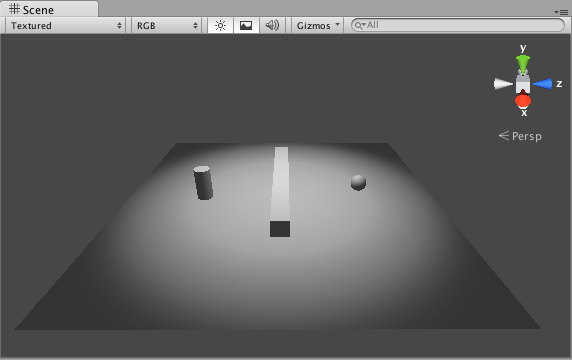
Straightforward stuff, make your scene look like the screenshot and tag the objects for later. If you want to recreate my scene exactly, do the following: Create a new project including the terrain assets and character controller packages. Then add Rain as above. Create a new terrain
- From the menu bar select:
- Terrain -> Create Terrain
- Terrain -> Set Resolution to 20 for the width and length
- Drag the scene around until you can see the terrain properly
Create the game objects
- Game Object -> Create Other -> Cube, Position (10,1,10), Scale (10,1,1)
- Game Object -> Create Other -> Sphere, Position (10,1,15)
- Game Object -> Create Other -> Cylinder, Position (10,1,5)
- Add the third person controller script to the Cylinder by selecting Add Component -> Scripts -> Third Person Controller. Click Add if an option to replace the existing component pops up.
- Game Object -> Create Other -> Spotlight, Position (10,15,10), Range 20, Spot Angle 80, Intensity 4
- Main Camera position (30,5,10), Rotation (0,270,0)
Tag the objects
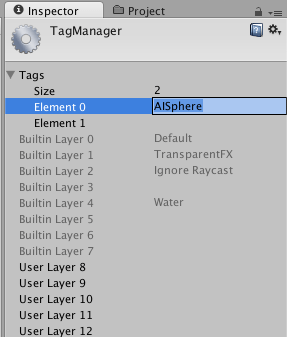
- Create a tag for the Sphere. From the inspector on any object:
- Tag drop-down -> Add Tag -> Tags drop-down
- Enter ‘AISphere’ into the Tags array
- Go to the inspector for Sphere and add ‘AISphere’ as the tag
- Tag the Cylinder as ‘Player’ (it’s a tag option by default)
##Using Rain{indie}
Creating a Recast Nav Grid
A navgrid defines a region for the AI to walk in. To add one to your scene:
Add a recast object
- Select the Rain option from your menubar
- Select Recast -> Create Recast Object
Select the new Recast object from your hierarchy
- Move the Recast object to the middle of the terrain (pos (10, 0, 10))
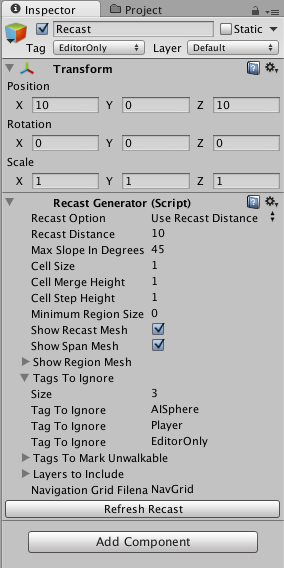
- Go to the Recast inspector
- Under ‘Tags To Ignore’, increase the size of the array to 3
- Add AISphere and Player to the ‘Tags To Ignore’ as it is in the screenshot. This will exclude these objects from the Nav Grid
- Check the options ‘Show Recast Mesh’ and ‘Show Span Mesh’. These will show where the Nav Grid is reaching once it is generated.
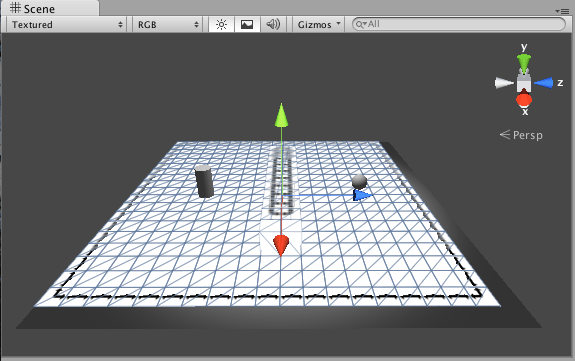
Now click Refresh Recast. This will generate a file, called ‘NavGrid’, that defines where the AI can go. You’ll notice that the Sphere and Cylinder aren’t covered by the Nav Grid, this is because they are marked in the tags to ignore option.
Make sure there is a filename in the ‘Navigation Grid Filename’ option. This file should have generated when you refreshed the recast - in this case the file is ‘NavGrid’. If you need to find the file, it’s located in Assets/AI/Resources/Navigation/. Find out more about the other Recast options here.
Creating an AI
First, add an AI to the Sphere:
- Select the Sphere
- Select the RAIN option from the menubar
- Select Create AI.
This adds the RAINAgent and AIKinematic Controller scripts to the Sphere. It also adds the Mind, Obstacle Avoidance Collider, Path Manager, and Sensor as child objects to the Sphere.
Now we need the AI to use the Nav Grid:
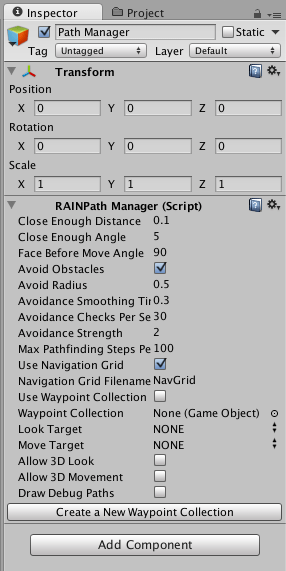
- Select the Path Manager (now a child object of the Sphere)
- Check the ‘Avoid Obstacles’ and ‘Use Navigation Grid’ options
- Enter the Navigation Grid Filename, in this case it’s ‘NavGrid’.
This will let the Path Manager know how to navigate based on the grid generated. Next, the Sphere’s sensor.
- Ensure that the sensor keeps the name ‘Sensor’. We use this later on.
- Under ‘Expanding Box Sensor’, change the Max Size to (5,5,5). This isn’t necessary, but the sensor was huge and will detect the cylinder from everywhere.
We’ll come back to the AI mind after the next steps.
Adding an Aspect
An aspect is detected by the AI, so we need one on the Cylinder.

- Select the Cylinder, then RAIN -> Add Aspect -> Visual
- This adds two scripts to the Cylinder: Entity and Decoration
- Give the Decoration script the Aspect Name ‘CylinderAspect’ Aspects are like a tag that a sensor in Rain uses. Currently, the Sphere has a sensor that can detect visual aspects, and we just added a visual aspect to the Cylinder. There are plenty of other aspects to use, find them all here.
Next, we need the sensor to know what aspect to look for. This is done with a behaviour tree.
Creating a Behaviour Tree
A behaviour tree lets the AI know what to do. To create one, do the following:
- From the menubar, RAIN -> Behaviour -> Behaviour Tree Editor
- From the Behaviour Tree Editor, select the drop-down under reload, and select ‘Create New Behaviour Tree’. Name this tree ‘AIBehaviour’ This creates a behaviour tree with a node called ‘root’. The root node is a sequencer node that will run its children in sequence until one fails.
For this tutorial, we want the Sphere to detect the Cylinder and then move towards it. To do that, we need to add the detect and move behaviour to the tree.
Detect Action
Behaviour trees use action nodes to perform actions. There are built in actions that we can use. Custom actions are possible, though aren’t necessary for this example. To add a detect action:
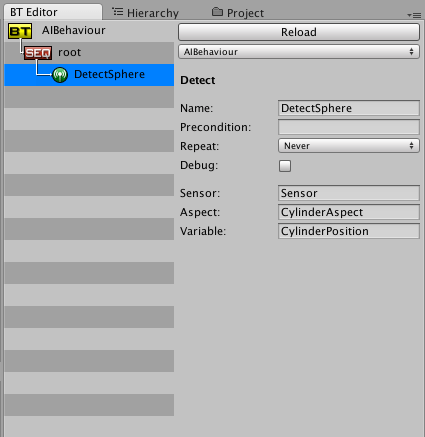
- Right click on the root node, then Create -> Action -> Detect.
- Rename it as ‘DetectSphere’.
- Add ‘Sensor’ in the Sensor field. This is the name of the sensor on the Sphere object.
- Add ‘CylinderAspect’ in the Aspect field.
- Add ‘CylinderPosition’ in the Variable field.
This creates an action that will use a sensor to find an aspect. When the aspect is found by the sensor, the game object with the relevant aspect is stored as a variable. Here, the Sphere’s sensor and the Cylinder’s aspect are used. The result is the ‘CylinderPosition’ variable that can be used later.
Move Action
Add a move action:
- Right click on the root, Create -> Action -> Move.
- Rename this to ‘MoveToCylinder’.
- Change the ‘Move Target’ to ‘Variable’, and enter the ‘CylinderPosition’ as the variable name.
- Change the ‘Move Speed’ to 1
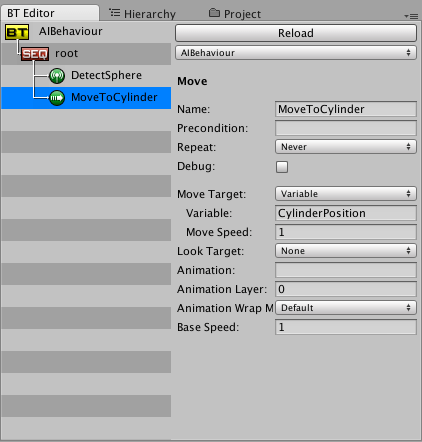
This will move the AI towards the Cylinder. To move, it needs to know where the Cylinder is. This is the value stored in the CylinderPosition variable from the previous step. You can also change the movement speed in the move action, but note that the Sphere’s RAINAgent script has Max Speed and Max Acceleration options. If you changed the speed on the move action and the Sphere is still slow, change the speed options on the Sphere’s RAINAgent script.
These two actions are evaluated in order by the root node. Since the root is a sequencer node, a child node won’t be run until the previous one succeeds. Here, the detection needs to succeed before movement can begin. Once movement begins, it will not stop, so the Sphere will continually move towards the Cylinder. For more information on behaviour trees and behaviour tree nodes, go here. ###AI Mind
The last step is to change the AI’s mind:
- Select the Sphere’s Mind
- Enter ‘AIBehaviour’ as the Behaviour Tree Filename, and ‘root’ as the Root Name.
Here we have entered the name of the tree we just created and it’s root node. This is the last connection needed and playing the scene should now work nicely. ##Playing the Scene
Use the arrow keys to move the Cylinder close to the Sphere. The Sphere will be waiting until its sensor finds the Cylinder’s aspect. Once the detection fires, the Sphere will forever move towards the Cylinder. This can be changed by using a precondition on the move node so that the node won’t evaluate until the precondition is true, though this wasn’t covered in this tutorial. Notice that the Sphere will avoid the wall where possible, and find the shortest path to the Cylinder.
That’s it for this tutorial, I hope it has given you a nice introduction of what Rain can do. Rain is very easy to use once you know where the options are. I tried to gloss over as much as possible to keep this light, but I will likely cover other areas, such as custom actions and different behaviour tree options, in the future.